Revitalizing Your Space with Cabinet Painting

Cabinet Painting Sacramento is an effective way to give your home a fresh, updated look without the high cost of replacing cabinetry. Whether you are looking to modernize your kitchen, bathroom, or other living spaces, painting cabinets can completely transform the appearance and feel of a room.
Cabinet Painting

Cabinets are a prominent feature in any space, and a fresh coat of paint can breathe new life into a dated or worn-out design. This process allows homeowners to customize their interiors, choosing colors and finishes that reflect personal style while enhancing the overall atmosphere of the room. With the right techniques and materials, cabinet painting can deliver professional-quality results that last for years.

Proper preparation is essential for achieving a smooth and durable finish when painting cabinets. Cleaning the cabinets thoroughly to remove dirt, grease, and residue is a crucial first step. Over time, cabinets accumulate layers of grime from cooking, handling, and general use, which can prevent the paint from adhering properly. A degreasing solution and warm water can help eliminate buildup and create a clean surface for painting. Once the cabinets are clean and dry, removing the hardware and doors makes it easier to reach all areas and ensures a more even application of paint. Labeling each piece helps simplify the reassembly process and avoids confusion once the painting is complete.

Sanding the cabinet surfaces is another critical step in the preparation process. Lightly sanding the wood or existing finish creates a textured surface that allows the paint to adhere better. For previously painted or varnished cabinets, using a medium-grit sandpaper helps remove the glossy finish and provides a rough surface for the new paint to grip. After sanding, wiping down the cabinets with a damp cloth removes dust and debris, ensuring a clean surface for priming and painting. Taking the time to sand properly helps prevent peeling and chipping, resulting in a long-lasting and professional-looking finish.

Priming the cabinets is necessary for achieving a smooth and even paint job. A high-quality primer creates a base that helps the paint adhere properly and provides a uniform surface for color application. Priming also helps block stains and imperfections, ensuring that the final coat of paint looks clean and consistent. Applying primer with a brush or roller ensures even coverage, and allowing it to dry completely before painting helps prevent streaking and uneven color distribution. For cabinets with heavy grain or knots, using a stain-blocking primer helps prevent discoloration and enhances the durability of the paint.

Choosing the right type of paint is essential for achieving a professional finish on cabinets. High-quality enamel or acrylic-based paints are commonly used for cabinets because they provide a smooth, durable surface that resists moisture, stains, and everyday wear. Satin, semi-gloss, and high-gloss finishes are popular choices for cabinet painting, as they reflect light and create a clean, polished look. Matte finishes, while less reflective, offer a soft and modern appearance that works well in contemporary spaces. Selecting a color that complements the overall design scheme of the room creates a cohesive and harmonious look. Light colors such as white, cream, and soft gray create an open and airy feel, while darker shades like navy, charcoal, and forest green add depth and sophistication. Bold colors such as teal, mustard, or burgundy create a striking focal point and add personality to the space.

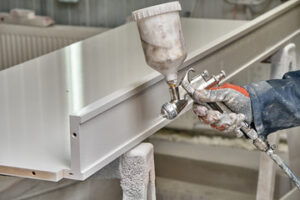
Application technique plays a significant role in the final outcome of a cabinet painting project. Using a high-quality brush or roller ensures smooth and even coverage without visible streaks or brush marks. Spray painting is another option for achieving a flawless finish, especially for larger or more intricate cabinet designs. Applying thin, even coats of paint and allowing each layer to dry completely before adding the next helps prevent drips and uneven color distribution. Light sanding between coats helps create a smooth surface and improves the overall finish. Patience and attention to detail during the application process contribute to a polished and professional result.

Reassembling and finishing the cabinets completes the transformation. Once the paint is fully cured, reinstalling the hardware and cabinet doors restores functionality and completes the updated look. Upgrading hardware such as handles, knobs, and hinges enhances the overall aesthetic and creates a cohesive design. Choosing hardware that complements the cabinet color and overall style of the room ties the look together and adds a refined touch. Soft-close hinges and drawer slides improve functionality and add a modern touch to the cabinetry. Taking the time to align doors and drawers properly ensures a seamless and balanced appearance.

Proper care and maintenance help preserve the look and durability of painted cabinets. Cleaning cabinets regularly with a soft cloth and mild soap helps prevent dirt and grime buildup, maintaining the finish and color. Avoiding abrasive cleaners and harsh chemicals protects the paint from damage and ensures that the surface remains smooth and glossy. Touching up minor chips or scratches with matching paint helps maintain the overall look and prevents further damage. Installing protective pads or bumpers on cabinet doors and drawers reduces wear and extends the life of the finish. Consistent care and maintenance keep painted cabinets looking fresh and vibrant for years to come.

Cabinet painting offers a cost-effective and impactful way to update the look of a home. Compared to the expense and disruption of replacing cabinets, painting provides a more budget-friendly solution while delivering a high-end result. This process allows homeowners to personalize their spaces, choosing colors and finishes that reflect individual tastes and complement existing decor. Cabinet painting is also an environmentally friendly option, as it reduces waste by reusing existing cabinetry rather than discarding it. With proper preparation, quality materials, and attention to detail, cabinet painting transforms a space and enhances the overall value and appeal of a home.

Cabinet painting also allows for creative expression and customization. Techniques such as distressing, glazing, and color washing add character and dimension to painted cabinets, creating a unique and personalized look. Two-tone designs, where upper and lower cabinets are painted in contrasting colors, create visual interest and add a modern touch. Adding decorative details such as molding, trim, or beadboard enhances the texture and style of painted cabinets, elevating the overall design. Experimenting with different colors, finishes, and techniques allows homeowners to create a custom look that reflects personal style and complements the overall aesthetic of the space.

The versatility of cabinet painting makes it suitable for a variety of design styles, from traditional and farmhouse to modern and minimalist. Painted cabinets create a clean and fresh backdrop that allows other design elements, such as countertops, backsplashes, and flooring, to stand out. The ability to change cabinet colors and finishes over time makes cabinet painting a flexible and adaptable design solution. As trends and personal tastes evolve, repainting cabinets offers an easy and affordable way to update the look of a space without major renovation. The ability to customize cabinets through color and finish ensures that the space remains stylish and current.

Cabinet painting is a transformative home improvement project that enhances both the aesthetic and functional value of a space. The process of cleaning, sanding, priming, and painting creates a durable and polished finish that stands up to daily use. Selecting the right materials, colors, and techniques ensures that the finished cabinets reflect personal style and enhance the overall design of the room. Professional-quality results are achievable with proper preparation, attention to detail, and consistent maintenance. Cabinet painting offers a cost-effective, sustainable, and impactful way to update the look and feel of a home, creating a refreshed and inviting atmosphere that lasts for years.

Roof Repair Tips For Homeowners

Your roof is your home’s unsung hero, shielding you from the elements year-round. If you notice signs of wear and tear, catching them early can save you from costly repairs or even a roof replacement down the road.

Visually inspect your roof for any shingles that are missing or cracked. Also check the attic for water stains or damp insulation. Click the Roof Repair Erie PA to learn more.

Shingles are prone to damage from exposure to extreme weather conditions and general wear and tear over time. Fortunately, this type of damage can often be repaired by replacing loose or damaged shingles. GR Construction USA recommends regularly inspecting the roof and addressing any minor issues promptly to avoid more serious problems.

Loose shingles should be removed immediately, as this is one of the most common causes of roof leaks. When a shingle is loose, water can seep underneath and cause further damage to the roof deck and attic.

To remove a loose shingle, begin by loosening the shingles above it with a pry bar. Then, carefully remove the shingle and its nails. Be sure to inspect the area for any other loose shingles and secure them as well.

When a shingle is damaged, it may exhibit cracking, blistering, or a loss of the ceramic granules that protect the shingle from UV damage. Cracking is a common sign of age and wear and tear, but can also be caused by weather exposure, changes in temperature, or dryness over time. Blistering is a severe form of damage that looks like bubbles on the surface of the shingle and indicates that the granules have been lost, leaving the shingle vulnerable.

Bruising is another condition that causes damage to shingles, and it occurs when debris is dropped onto the roof and damages the surface of the shingle. This can compromise the shingle’s waterproofing abilities and needs to be replaced as soon as possible.

Aside from repairing shingle damage, regular inspections can help extend the life of your roof. This includes removing debris, checking the flashing around chimneys, vents, and skylights, and looking for any signs of water infiltration. When you notice any of these problems, it is important to take action right away, as failing to do so can lead to further damage and expensive repairs. For this reason, it is essential to schedule routine roof maintenance with an experienced roofing contractor. GR Construction USA can inspect your roof, identify any potential issues, and provide you with a complete roof repair solution.

Leaks

While water dripping from the ceiling is the most obvious sign of roof damage, it’s not the only one. Water can also seep into walls, creating mold and mildew and damaging insulation. If the leak is severe enough, it can lead to rotting of the frame and foundation of your home. If you think you have a leak, there are several steps you can take to try and identify and repair the problem.

Look for signs of moisture in the interior of your home such as water spots on the ceiling or walls, discolored patches, peeling paint around windows and doors, a musty smell in certain rooms, and rotted framework wood. Leaks can also be caused by broken, missing or cracked shingles, loose flashing, and clogged gutters or downspouts.

If there are no obvious signs of a leak, check your attic with a flashlight and make sure the insulation isn’t damp or stained. If there is a leak, it will often be near things that go through the roof such as dormers, chimneys, vents, and skylights.

Once you’ve located the leak, it’s time to start repairs. Remove any shingle or other debris that has been lying on the roof, then clean the area and apply roofing cement. For larger holes, you’ll need to use a sheet of rubberized patching material such as this.

It’s important to find and repair leaking areas as soon as possible because moisture can do serious damage to your walls, floors, and furniture. If the leak is bad enough, it can even cause your foundation to crack and sink, which can have a dramatic effect on the value of your home.

Unless you’re comfortable climbing onto the roof, you should always leave leak repairs to professional roofers. However, there are some quick, temporary fixes that you can do yourself. You can seal small leaks with a bitumen-backed flashing tape, such as this Selleys product. It can be found at most hardware stores, but if you’re unsure of how to apply it or you have a large hole in your roof, it’s best to call in a professional.

Water Damage

A leaking roof isn’t just an inconvenience for homeowners. Water can seep into the walls, ceilings, foundation and home systems, causing serious damage in the long run. It’s important to act fast and call in a professional for emergency roof repair if you notice visible signs of water damage.

Check for puddles and damp spots inside the house, especially in attics and crawl spaces. Use a flashlight to look for any soft or moldy areas that indicate the source of a leak. If the problem isn’t as severe, it might be possible for homeowners to fix it themselves. For more complex or major issues, it’s always a good idea to consult with a roofing pro.

Water infiltration can lead to a number of problems, including mold and mildew, which can be very harmful to people with allergies, asthma or other respiratory conditions. It can also cause structural damage to joists, rafters and trusses. It’s a major issue that should be addressed as quickly as possible to minimize the damage and prevent more expensive repairs in the future.

The most common entry points for water are holes, loose shingles and damaged seams around vents and soffits. If you have a leak, clear away any moisture and cover the area with a tarp or shingle patch until it’s repaired. For leaky seams, apply caulk for a temporary fix.

Leaks can also occur in the dormers and other dormer-like areas of a roof, and are often caused by step flashing or chimney flashing that has deteriorated. These are short sections of overlapping “L”-shaped flashing that channel water over the shingles and downhill from them. It’s easy to replace a damaged piece of step flashing by carefully loosening the shingle and siding, then sliding in a new section of flashing and using roof cement to secure it.

Leaks from the pipe collars and base flashing are more complex to repair, because they require removing the existing flashing and surrounding shingles. In many cases, the entire assembly needs to be replaced, and it’s usually best for a professional to handle this type of roof repair.

Storm Damage

When the weather turns sour, a property owner must be prepared to protect his home from damage caused by heavy rain, hail, and strong winds. The roof is particularly vulnerable to these events, so it’s important to know how to spot storm damage and act quickly to prevent further problems.

If you notice any of the tell-tale signs of damaged shingles or roof leaks, it’s time to call for a professional inspection. However, be careful not to go outside until you’ve received the all-clear from local authorities. Additionally, it’s important to avoid unscrupulous “storm chasers” who may approach your house after a storm and offer free inspections or repairs.

While a storm can damage any part of your property, it’s important to prioritize safety and take temporary measures to protect the most vulnerable areas until a professional can make permanent repairs. These steps can include patching leaks, securing loose shingles, and covering exposed sections with tarps to prevent further damage. It’s also a good idea to create an inventory of all the storm-related damage, as this information will be helpful when filing an insurance claim.

The most common types of storm damage are caused by wind, hail, and falling debris. These issues can compromise the structural integrity of a building and leave a property at risk for leaks, water damage, and more.

Damage from hail can cause dents and cracks in the roof, as well as windows and doors that break under the force of the projectiles. This type of damage often goes unnoticed because it’s hard to see from the ground, but these problems can worsen over time and weaken the structure.

Even the most severe damage from a storm can be repaired through proper maintenance and an adequate homeowners insurance policy. Our associates are experienced with working with homeowners’ insurance companies to get the maximum reimbursement for your storm damage repairs. In addition, we provide preventative maintenance services to help you reduce the risk of costly repairs in the future. Call us to learn more about our services and how we can help you save on your next storm-related repair.

Choosing Between Blinds and Shades

Custom Blinds and Shades KY are window treatments that can improve the look of any room. However, choosing the right one can be challenging for homeowners.

Blinds

Blinds and shades both offer privacy and light control. Blinds have slats that tilt for more precise light control and shades offer simpler open/close operation.

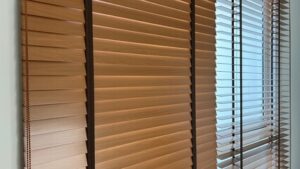
Blinds are often favored for their superior light control, durability, and a wide range of materials and customization options. Homeowners can choose a style and color that matches their home decor while also incorporating their own unique aesthetics. They can also select a material like natural wood’s rich warmth or faux wood’s long-lasting strength. Blinds can also be made with varying width slats to accommodate a variety of window sizes and shapes.

Shades are a versatile option for those who prefer to let in natural light and provide privacy when needed. They can be custom-made with a variety of fabric options that provide different levels of light filtration, from gently diffusing to blocking out sunlight completely. Homeowners can also customize their shades by choosing a top down/bottom up option for better control over light and privacy. Depending on the type of shade, homeowners can also find options that are energy efficient or protect their furniture and carpets from harmful UV rays.

Some shade options include cellular shades, which trap air between their honeycomb-shaped cells to help keep the room temperature comfortable and reduce energy bills. Other styles, such as pleated shades, offer a more drapery-like look that pairs well with a traditional or contemporary interior design.

In addition to fabric options, shades can be created with a wide selection of frame colors and designs to fit any home’s aesthetic. Homeowners can also choose between inside-mount or outside-mount blinds, which affect how they’re mounted on a windowpane. Finally, homeowners can opt for a valance to add a pop of color or texture at the top of their window.

Another important consideration when choosing a shade is its level of maintenance. Depending on the type, some shades may need occasional vacuuming or gentle spot-cleaning, especially if they’re in high-traffic areas or have kids and pets. While a few cleanings will likely be enough to maintain the look of most shades, some might need regular professional care for stains and dirt.

Light Control

When it comes to window treatments, blinds and shades are two of the most popular options. They offer a variety of advantages over other window treatment types, including precise light control and energy efficiency. Blinds are available in a wide range of styles, materials, and colors to fit various interior decor styles. Blinds are typically easy to adjust with a tilting wand and come in various tilt options for different levels of light control. Blinds can be upgraded to cordless or motorized for child and pet safety.

Shades are softer window coverings made of fabric or other woven materials. They can be layered with other treatments like drapery to add more texture and dimension to a room. Shades are usually more opaque than blinds and come in a variety of light filtering fabrics that can block out the sun without sacrificing privacy. Some types of shades, such as cellular or honeycomb shades, are known for their insulating properties and can help regulate a room’s temperature.

Both blinds and shades can be fitted with blackout or privacy liners to protect delicate natural fibers from UV exposure and create the desired level of darkness or privacy. They can also be upgraded to cordless or motorized for increased safety and ease of use.

The best choice for your home depends on the functionality of the space and the amount of light control you need. Consider the room’s purpose, evaluating its design, colors, and existing decor to make sure the window treatments will be a seamless fit. Also consider your budget and installation process to narrow down the selection.

Both blinds and shades are versatile and durable, making them a smart investment for any home. But, if you’re not sure which type is the right fit for your space, contact your local Budget Blinds location to schedule a free in-home or virtual consultation with one of our design consultants today! We look forward to helping you choose stylish and functional window treatments that will add value to your home for years to come.

Privacy

The type of window treatment you choose will influence the level of privacy it offers. Blinds are a versatile option with horizontal or vertical slats that can be tilted to control light and privacy in your home. This versatility also allows you to pair them with drapery for a more layered look.

Blinds also come in a variety of materials, so you can find the right style for your space. For example, vinyl blinds have a durable construction and are available in colors that match your current décor. They’re also a popular choice because they’re affordable and offer good light control.

Shades, on the other hand, are a single window covering made from softer fabrics that have an elegant look. They come in many different types, including woven wood shades, roller shades and Roman shades. They can be rolled up on a tube (Roller shades), folded up in an accordion style (Roman shades) or pushed up in an accordion-like structure (Pleated and Cellular shades).

Because shades are so much more flexible, they can provide a high level of privacy. They’re available in a wide range of fabric options that vary in transparency, allowing you to find the perfect balance between light and privacy. They can also be paired with drapery for more privacy or to create a sophisticated, formal look.

For example, sheer shades are ideal for homeowners who want to enjoy natural light during the day but don’t mind sacrificing privacy at night. They’re available in a variety of colors, styles and textures, ensuring you can find a set that perfectly complements your existing décor.

On the other hand, if you’re looking for a more traditional, timeless look, consider wood woven shades. These beautiful, eco-friendly window treatments offer the classic look of woven bamboo or grass and come in a variety of shades. They’re also moisture-resistant, making them a great choice for kitchens and bathrooms.

Whether you prefer blinds or shades, each provides distinct aesthetics that will enhance the style of your room. Choosing the right one for your space will depend on how much privacy you’re looking for, how often you’ll be using them and your cleaning preferences. Blinds can be cleaned with a vacuum’s brush attachment or a cloth, while shades can be spot-cleaned with a damp cloth.

Energy Efficiency

Blinds have long been the go-to window treatment for homeowners looking to control light and privacy. They offer a traditional look that is often more versatile than shades, which tend to be more modern and colorful and make more of a statement.

Blind slats can be tilted up and down to adjust the amount of sunlight and solar heat that enters a room, which helps with energy efficiency. The slats are also designed to block out glare and can be adjusted for more privacy when open. Shades, on the other hand, don’t offer the same level of light control.

Shades are available in a variety of colors, fabrics and patterns, but they can’t tilt or filter the light like a blind. Many shades come with a top down/bottom up option that allows you to raise them from the bottom and then let in natural light from the top. They’re also offered in room darkening materials that completely block out light or light filtering fabrics that help reduce glare and regulate temperature.

When it comes to energy efficiency, shades are often a better choice than blinds. Their insulated fabric construction traps air in distinct pockets to prevent heat transfer and keep your rooms warmer in the winter and cooler in the summer. Many also provide UV protection to help protect interior furnishings and artwork from fading over time.

Blinds, on the other hand, may require more maintenance due to their slat design. They can collect dust and other allergens, so they might need more frequent cleaning than shades made of fabric. They’re also more likely to get damaged, especially if they’re exposed to harsh weather conditions or heavy usage over the years.

It’s important to consider your personal preferences and the functions of each room in order to determine whether blinds or shades are a better fit for your home. Keep in mind that both types of window treatments are available in a variety of colors, styles and fabrics, so there’s sure to be an option to suit every aesthetic. If you’re unsure about which window treatment is best for your home, consult a professional to help you find the perfect solution.

The Benefits of Hiring an Insulation Remover

Removing old insulation can be a big project. It requires clearing out the attic space, vacuuming up clumps, and transferring the contents of large, heavy-duty bags to a disposal site.

Using the right gear makes the job easier: Gloves protect hands from irritants, and goggles or a respirator to guard against inhaling fibers or dust. Click https://www.perthinsulationremover.com.au/ to learn more.

Insulation is a crucial component of any home, and proper insulation offers a variety of benefits. However, there may come a time when your insulation needs to be removed due to damage or an upgrade to more effective materials. When you hire a professional, you’ll be sure the job is done right, which can result in improved comfort for you and your family. In addition, you’ll also enjoy lower energy bills thanks to enhanced energy efficiency. Insulation removes compacted or soiled insulation materials such as batt and roll insulation and blown-in cellulose or fiberglass. It requires a special vacuum system.

Reduced Energy Bills

Insulation is a big investment that pays off well for homeowners in terms of lower energy bills. The right insulation type can save families up to 30% on heating and cooling costs. Additionally, the resale value of a home will increase due to the more efficient property.

Insulation removal is an important step in many renovation projects, whether you want to upgrade to a more energy-efficient insulation material, address moisture issues or pest infestations, or prepare for construction work. This process helps create a safer and healthier living environment by removing rodents, dirt, toxins, and mold and reducing air leaks and thermal inconsistencies.

The process of removing old insulation typically involves clearing out the space and vacuuming all of the debris. This is a messy job, and it’s recommended that most homeowners opt to have professional services complete the task. This way, you can be sure that the area is clean and free of contaminant without spreading the dust throughout your home. Additionally, it’s much faster and more efficient to have professionals handle the job rather than attempting it on your own.

Insulation removers use a specialized vacuum system to suck out old insulation from the attic and dispose of it in a safe and efficient manner. This type of equipment is specifically designed to deal with blown in cellulose insulation, and it uses an industrial hose to suck up all the materials and deposit them into large waste bags that are safely contained within a secure container.

Once the attic is clear of all contaminated materials, professionals can proceed with installing new insulation in the attic or other spaces in the home. This can be done using a variety of different types of insulation, including foam and fiberglass. This method of installation is quicker and less disruptive than tearing down walls, which makes it an ideal option for homeowners who want to improve the efficiency of their homes.

Reduced Risk of Damage

Insulation can become damaged over time, which reduces its ability to regulate temperature and can also increase the risk of mold or rot. In addition, pests such as rodents and insects may nest in old insulation. Removing and replacing worn insulation can help protect your home from these pests.

Old insulation may be replaced with newer material that offers greater energy efficiency and can contribute to a higher sale price if you plan to sell your home in the future. Removing and replacing existing insulation is often a less expensive option than installing new insulation, which can save you money in the long run.

Blown in cellulose insulation can be tricky to remove without proper equipment or safety precautions. It is essential to wear protective gear including a mask or respirator, gloves, and goggles to prevent breathing in fibers and dust particles. If possible, it is a good idea to lay down plywood sheets on the attic floor before starting the process. This will provide a stable surface to walk on and can reduce the likelihood of falling objects, trips, or falls.

Having your blown in insulation professionally removed by a licensed and insured company will ensure that the process is completed safely. This includes following strict protocols when asbestos is present to avoid releasing dangerous particles into the air. Additionally, professionals are trained to properly dispose of the materials and comply with local regulations. This can save you time, money, and stress in the long run. You can find a reputable and licensed insulation removal service by researching online reviews, requesting referrals, or looking through local business directories. They can also provide additional services such as air sealing and installation of new insulation.

Improved Indoor Air Quality

Insulation helps to keep a home at a comfortable temperature and prevents outside air from entering through gaps in the building envelope. However, old insulation can become contaminated by mold and mildew. This contamination taints the air quality and can cause respiratory issues for those living in the house.

Older insulation may also be a home for rodent droppings. These droppings are a health hazard and can spread diseases such as hantavirus and leptospirosis. The air tainted by these droppings can affect people living in the house, particularly those who suffer from asthma or other respiratory conditions.

Moisture damage is another reason that old insulation needs to be removed and replaced. Moldy or mildewy insulation taints the air and can compromise the integrity of the building structure. This can lead to costly repairs and other problems down the road.

Professionals who specialize in insulation removal and replacement are highly trained and follow a rigorous set of safety precautions to minimize risks. They use specialized equipment and protective gear to ensure that there is no release of harmful fibers or contaminants during the process. They also handle the proper disposal of the old insulation according to local regulations and guidelines, ensuring that it is not exposed to the environment.

Adding new insulation to your attic can dramatically improve the indoor air quality of your home and help you save on energy bills in the long run. Moreover, it will allow you to upgrade to newer, more effective insulation materials that offer better energy efficiency and can reduce your carbon footprint. It can also increase the sale price of your house if you plan to sell it in the future.

Reduced Risk of Hazardous Materials

Insulation removal is an important part of home renovation projects. It can help to improve indoor air quality, address moisture or mold issues, prevent pest infestations, and facilitate construction work. But it’s a tricky job that requires careful planning and execution.

If a homeowner decides to handle the removal themselves, they’ll need to prepare by clearing the attic space of stored items and putting everything in storage bags. They’ll also need to wear protective gear like gloves, eye protection, and a respirator (preferably an N95 mask) to avoid inhaling dust, fibers, or potential mold spores during the process.

It’s recommended to hire a professional insulation removal service, as they can ensure that the contaminated insulation is handled properly and does not pose any health risks. They will use a high-powered insulation vacuum to suck the old insulation up into bags that are then taken away and disposed of properly.

The process of removing attic insulation can be a messy one, which is why it’s best to leave it to the professionals. In addition to cleaning up the mess, they will also make sure that the contaminated insulation doesn’t affect your living environment and that the space is free of mold and rodents before leaving it to you.

The gaping holes in traditional insulation allow air to easily enter your home, causing humidity and odor issues. Additionally, it can bring with it airborne allergens like pollen and dust, which can irritate those who suffer from asthma or allergies. When a home’s insulation is removed and replaced, these issues are eliminated and air quality is restored to normal levels. Aside from improving the comfort of a home, replacing insulation can also lower energy bills and protect the value of a property.

Frameless Glass Enclosures

Shower doors are a luxurious upgrade that improves your bathroom’s appearance and adds value to your home. Frameless glass shower doors give a bathroom a sleek, updated look that boosts resale value.

Shower Doors

They are custom fabricated for your specific shower enclosure to avoid gaps and caulk lines that detract from the upscale look. Keep reading the article below to learn more about Frameless Glass Shower Doors

The open space of frameless shower doors is much easier to clean than traditional framed showers, which have metal framing and caulking that are often a haven for mold, mildew, and soap scum. Keeping your glass shower door free of these grimes is important to keep the space bright and inviting.

Regular cleanings with the right supplies and techniques are all you need to keep your glass shower squeaky clean. Use a gentle cleaner that won’t damage the surface, such as a non-abrasive vinegar and water solution or a glass cleaner specifically designed for showers. Buff the surface with a microfiber cloth afterward for a streak-free shine.

Don’t forget to clean the metal tracks and hinges on your frameless shower doors as well. These areas are prime spots for mold, trapped soap scum, and mineral build-up. Scrub them with a non-abrasive brush or sponge and dry thoroughly to prevent corrosion.

Another way to help your glass shower doors stay sparkling clean is by having them treated with a protective sealant. A company such as Sprayway offers treatments that help repel water and oil to make it easy to clean your shower without leaving a sticky residue. This will also protect your new glass from etching, stains, and build-up.

Easy to Install

Many homeowners choose to install frameless shower doors in their bathrooms because they provide a sleek look that can create a modern, spa-like aesthetic. They can also add a touch of luxury to the space and boost the resale value of the home. However, installing these types of doors can be tricky for even the most experienced DIYer. It’s best to consult with a professional and hire them to do the job if you don’t have the necessary experience or tools.

A professional can ensure that the glass is installed properly and securely to the shower wall, preventing leaks. They can also help you choose the right glass for your bathroom, including options like frosted or acid wash glass. These types of treatments make the glass less see-through, creating more privacy for your shower and reducing cleaning time as well.

Once the installation is complete, you can use a non-abrasive glass cleaner such as Windex or Sprayway to keep the shower glass clean and sparkling. This will remove soap scum, mineral buildup and other debris that can create streaks and dullness. Regular cleaning will help prevent water spots and other grime from building up over time, ensuring that your shower looks brand new at all times.

While framed showers are still the most common type of shower, you can find plenty of other options that can give your bathroom a modern, minimalist feel. Sliding doors, also known as bypass doors, slide open on tracks located at the top and bottom of the shower, while pivot doors swing open to allow entry. These options are great for small showers and can add a spacious feel to the room.

Easy to Maintain

Unlike framed shower doors, frameless glass doors do not collect water, which can cause corrosion and mildew. Instead, they are easy to keep clean with a squeegee after each use. You may also need to occasionally wipe down the glass with white vinegar or a similar cleaning solution. For tougher stains, mix equal parts of baking soda and water to create a paste that can scrub away hard-water deposits. Then rinse the area thoroughly.

Frameless doors are made of tempered glass, which is harder than regular glass and helps prevent jagged shards. However, you should still be careful when using your shower to avoid breaking the door or getting cut.

Some frameless customers choose obscure privacy glass rather than clear glass because they believe it will hide soap scum and film better, resulting in less cleaning time. Others simply prefer the look of frosted or decorative glass. If you have a preference, your glass retailer will have many options for you to choose from.

Another thing to consider is that frameless shower doors do not have the rubber seals that framed doors incorporate to help minimize the possibility of water leaks. This means that it is possible for a problem during the installation process to result in puddles on your bathroom floor if you don’t have a contractor with high quality standards and experience.

However, it is possible to prevent most issues that could occur with frameless shower doors by working with a professional who offers custom installations. This will ensure that your doors are properly sized and installed to reduce the likelihood of leaks or damage. Also, you should always check your doors and surrounding hardware regularly to make sure everything is secure and that no cracks or chips have formed.

Sleek Appearance

While framed doors create an undefined line around the shower, frameless shower doors allow for a more visually open space. They are typically made of glass that is tinted or etched to match your bathroom’s design. This creates a cohesive look that is both stylish and sophisticated. They also go well with minimalist interior decorating trends that have become popular in recent years.

Frameless doors are also easier to clean than framed ones. The minimal design eliminates the crevices that trap soap scum and mildew, making it easy to wipe down the entire surface. This type of shower door is also more visually appealing because it allows you to see the beauty of your bathroom tile and other decor.

Lastly, frameless shower doors let in more natural light, which makes your bathroom feel larger and more airy. It’s important to have enough light in your bathroom, especially for tasks like shaving and applying makeup. Additionally, natural light can help reduce the appearance of dark spots and other imperfections on your skin.

If you are considering renovating your bathroom, frameless shower doors should be on your list of options. They can improve the overall aesthetic of your bathroom and add to its resale value. However, before you commit to a remodel project, be sure to consider all of the pros and cons associated with framed and frameless showers. This will allow you to make an informed decision that best suits your home and family’s needs. Then, you can enjoy your new bathroom with peace of mind. For more information about how to choose the right shower doors for your home, contact a local glass professional.

Increased Resale Value

Despite their initial high cost, frameless glass shower doors tend to bring in a strong return on investment for homeowners looking to upgrade their bathrooms. Their sleek, contemporary look adds a sense of luxury and sophistication to any home, and the lack of frames allows for natural light to flood the space, resulting in an open, airy feel.

As a result, homebuyers will likely be more attracted to homes with these bathroom upgrades, potentially driving up the price of a property and making it easier to sell quickly. With this in mind, investing in a glass shower can be a worthwhile project for homeowners who are thinking of selling their Maryland home within the next few years.

However, determining the exact return on investment for this upgrade can be difficult due to several factors. For instance, homeowners must carefully consider the cost and installation process associated with frameless shower doors as well as their potential impact on a home’s overall value.

In addition, homeowners must ensure that their shower enclosure is compatible with frameless glass and that the necessary adjustments are made. In some cases, a new enclosure may be required to accommodate the added weight and size of frameless doors.

Fortunately, a qualified glass company can provide accurate measurements and ensure a seamless fit to help homeowners avoid additional expenses and complications down the road. Moreover, if homeowners opt for see-through glass, they can save even more time and money down the line as it will be easy to spot dirt and mildew in hard-to-reach corners and seams. This allows for more efficient cleaning and maintenance that can keep the bathroom clean longer and prevent costly repairs in the future.